Strain Hardening Simulation on GPU
We can run a tensile test simulation of a single-crystal Cu using the following commands (running ExaDiS on GPU). Use of GPU allows us to run the simulation much more efficiently and hence reach a larger strain to see the strain-hardening behavior more clearly. Execute the following commands to run the simulation
cd ${OPENDIS_DIR}
cd examples/10_strain_hardening/
python3 test_strain_hardening_exadis.py
Simulation Behavior
The simulation creates a folder called output_fcc_Cu_15um_1e3 to store the results files. On MC3.stanford.edu (gpu-ampere), it takes about 13.6 hours to run 10000 steps of the simulation, reaching a shear strain of approximately 1% (or ~0.4% uniaxial strain). The simulation will write a data file to the output folder for every 100 steps. By default, the stress_strain_dens.dat file stores certain essential information of the tensile test — it contains 4 columns corresponding to step, strain, stress (Pa), and dislocation density (m-2), respectively.
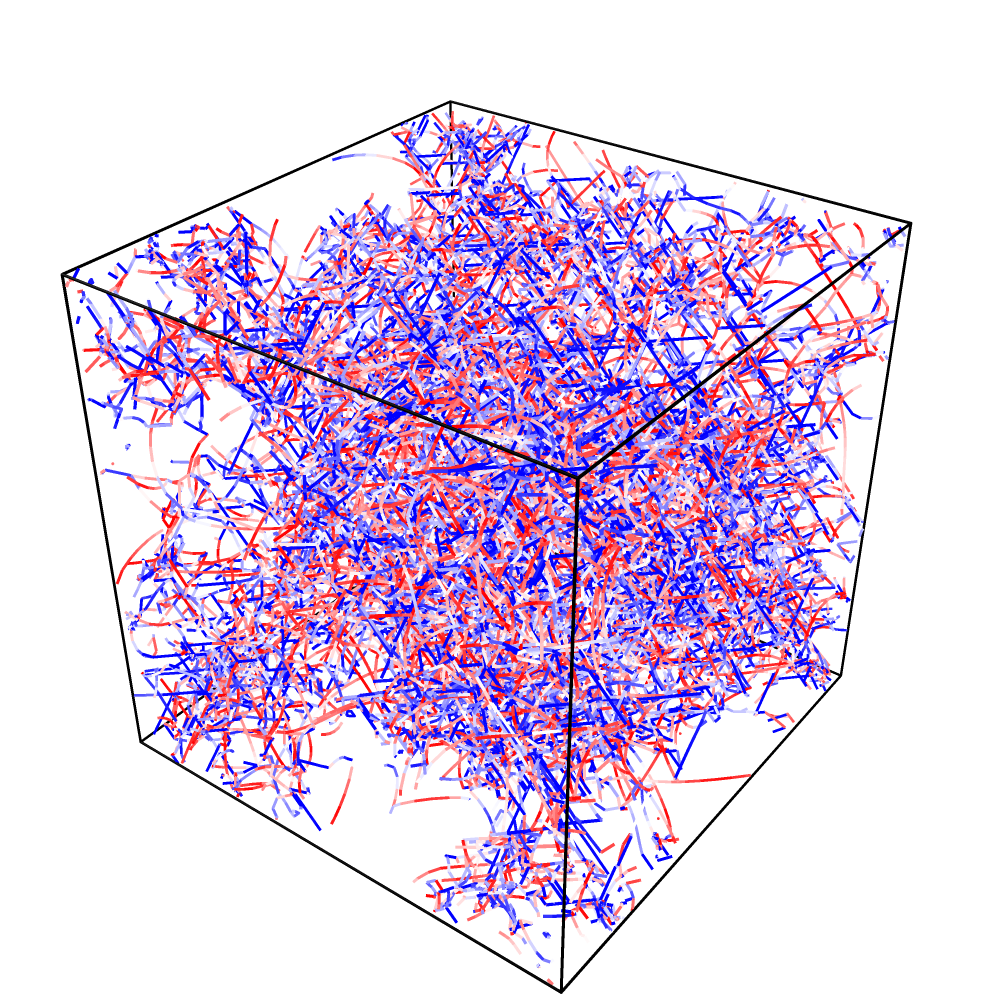
The final dislocation configuration (config.10000.data) after 10000 steps is shown below.
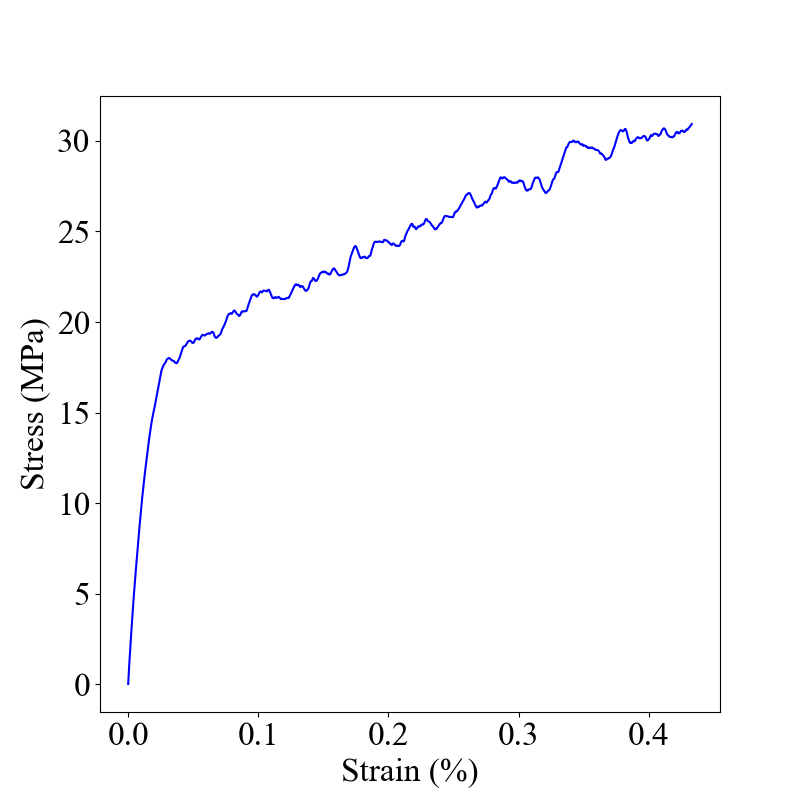
The predicted stress-strain curve is shown below.
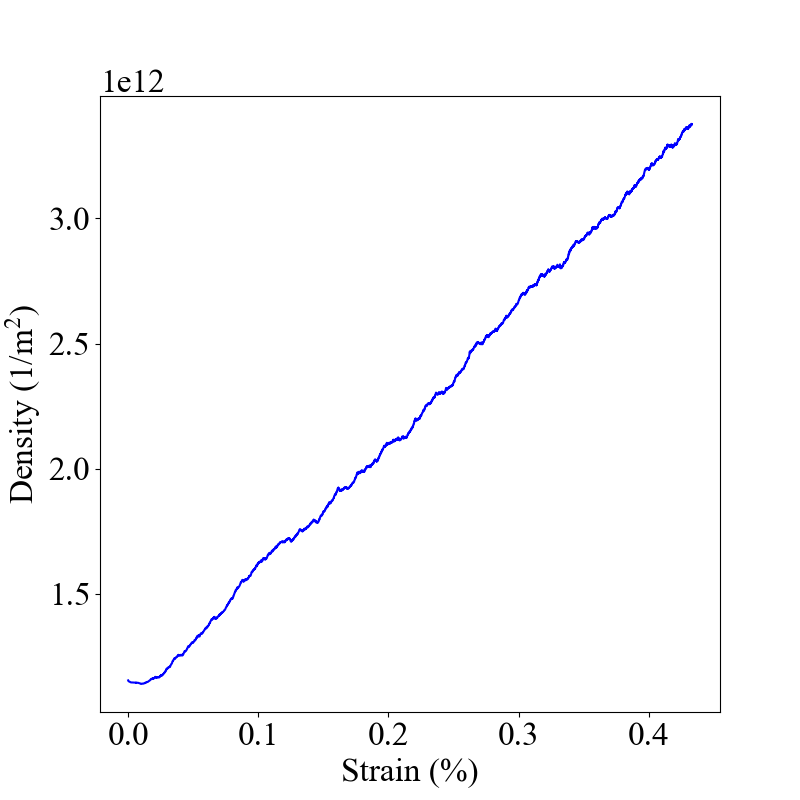
Here is how the total dislocation density changes with strain. The increase of dislocation density (i.e. dislocation multiplication) with strain is a key mechanism for strain-hardening.